Fellow Star Wars obsessees...do you find yourself with too few light sabers at your disposal? Do you wish for both more and a better variety? Do you long for personalized hilts a la your favorite characters?
Though I never thought I would be the one to share this information with you, I am here to say that with basic trips to pool and hardware stores, you can, in one afternoon, have an enormous selection of sabers at your disposal.
Version 1: The Simple Saber
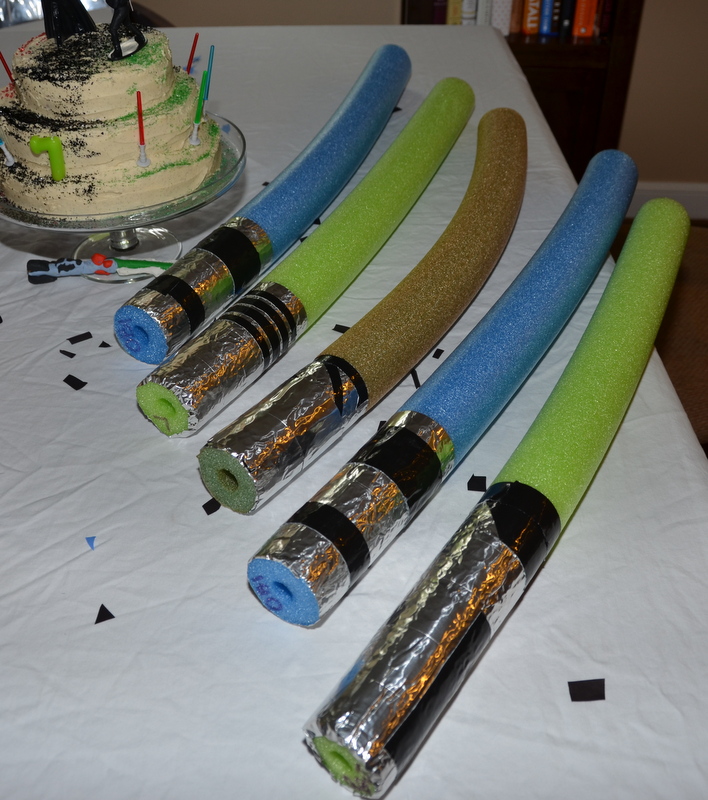
Needs for 1-2 sabers: a swim noodle in your preferred saber laser color; aluminum tape (or silver Duck/duct tape though the aluminum tape is preferable); black Duck/duct tape; a sharp knife; scissors.

One standard swim noodle will yield two single sabers or one double, a la Darth Maul.
If you plan to make two, measure the noodle and, using your sharp knife carefully, slice it crosswise at the midpoint. Using the aluminum tape, tightly wrap one end of each noodle half. This is the hilt foundation. Then, using your scissors to cut strips, knobs and such, either recreate your favorite character's hilt or make up your own.
If you are making a double-sided saber, do not cut your noodle. Instead, keep it whole and follow the above instructions regarding aluminum and black tape use but placing the hilt at the noodle midpoint.


The Simple Saber is great for kids (and their parents) who want to engage in full battle with no worry of injury. Swim noodles really can't do much damage, so kids can beat the crap out of each other in battle and you don't need to be too concerned. This was a GREAT birthday party activity and take-away (made one for each guest).
Version 2: The More Complex Swim Noodle Saber - PVC Hilt
*This does not make a double-sided saber.
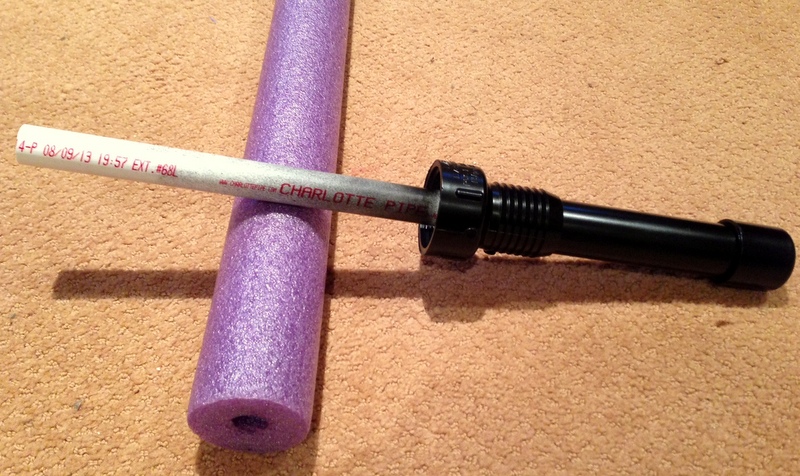
Needs for 1 single saber: a swim noodle in your preferred saber laser color; aluminum tape (or silver Duck/duct tape though the aluminum tape is preferable); black Duck/duct tape; a sharp knife; scissors, matte black plastic-compatible spray paint; 1 two-foot section of 1/2" PVC pipe; one two-foot section of 1" PVC pipe; one 1" PVC pipe cap; one 2" threaded female PVC to barbed adapter; PVC cement; grinder or some other way to shave down the 1/2" PVC cap to fit inside the 1" pipe.
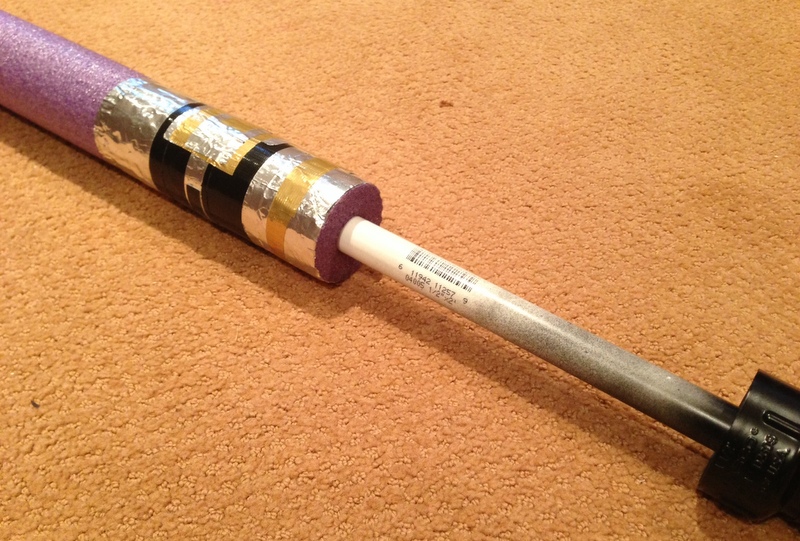
As for the Simple Saber, slice your noodle in half at the midpoint. Cut the 1/2" PVC pipe in half. Cut the 1" PVC pipe in an 8" section. The 1/2" PVC will just barely fit into the core of the noodle; this is good because you don't want the noodle flying off during battle. Grind the 1/2" PVC cap down until it can just barely fit inside the 1" PVC pipe (the starting exterior dimension of a 1/2" PVC cap is more than 1"). Attach the cap to the 1/2 pipe with the cement and then apply more cement to the outside of the cap and insert it into the 1" PVC pipe. Now you'll have the two pipes aligned exactly coaxially.

Then add some additional cement to the barbed adapter and position it over the the end of the 1" pipe to make the to of the hilt. Finally, cement the bottom cap in place. After two hours, the cement should be cured. Spray paint with plastic-compatible paint. You don't need to paint the length of pipe that fits into the noodle.


The Saber with PVC hilt version is great because you can switch saber laser colors based on who you're pretending to be. For example, Mace Windu has a purple saber while Darth Vader's is red. Luke had both green and blue sabers. Yoda's is green. And so forth.
Version 3: The Most Complex Hilt, No Laser (Yet)
*This is an artful approach for fans who simply want to wear an awesome yet retracted saber on their belt. We've not yet attached a laser.
Needs: 1 one-inch wooden dowel; sandpaper; hacksaw; aluminum tape (or silver Duck/duct tape though the aluminum tape is preferable); black Duck/duct tape; scissors; matte black spray paint; short silver screw with large top; red Sharpie; clear spray lacquer.
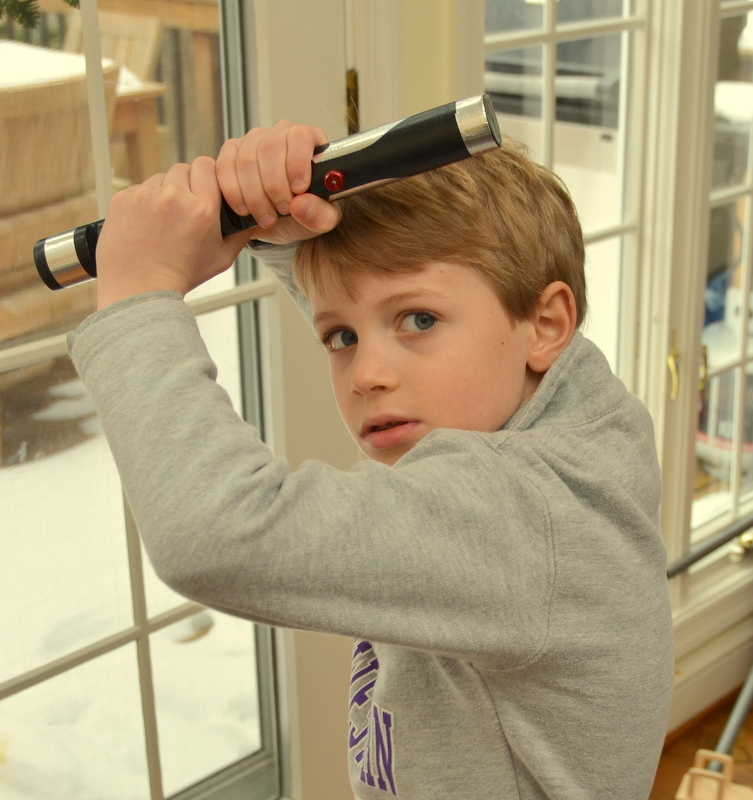
Carefully research the hilt you wish to copy, unless you are creating your own. Jack wanted Qui-Gon Jinn's hilt, and this picture guided his and Tom's carpentry and subsequent paint/tape additions.

Using a hacksaw and drill, Tom cut away sections from the dowel by first drilling holes and then cutting down with the hacksaw to meet the edges of the drilled holes. Jack then smoothed them out with sandpaper. They screwed in a screw, colored the top with red Sharpie and later coated it with lacquer because Sharpie rubs off of metal after a while. The red screw was Jack's idea; stylistically, I love it!


You can't see it here, but Tom attached a piece of a plastic bottle (the plastic top of the spray paint) as a clip so that Jack can hang the hilt from his belt.
Go, fans, GO!


